Verifiers
This page outlines the necessary steps for becoming a verifier on GlobaliD's credential platform.
Prerequisites
Before you become a verifier in our ecosystem, you need to create a Developer App.
Overview
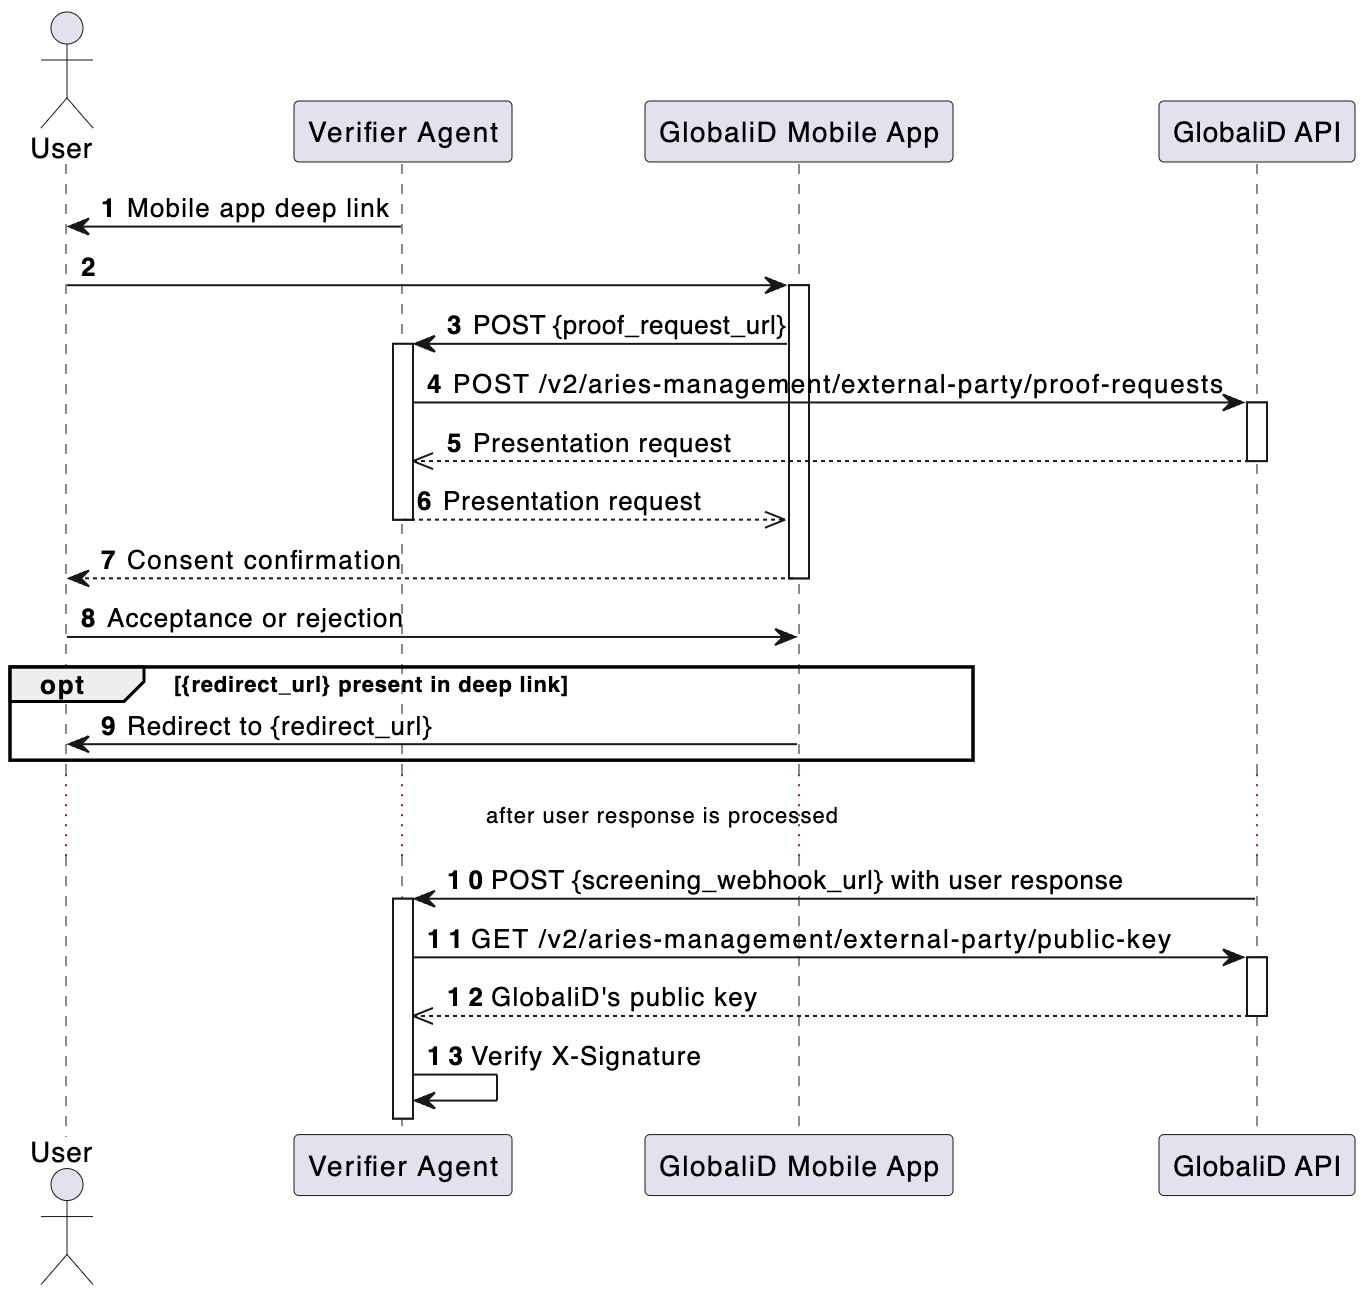
Receiving a verifiable presentation from a holder involves the following steps:
Create a deep link.
Create a presentation request.
Receive the holder's response.
(Optional) verify the message signature.
Here's a high-level sequence diagram that outlines the process:
Check out our library for Node.js to make these steps easier!
Create a Deep Link
To initiate the process of receiving a verifiable presentation, you will need to generate a deep link into GlobaliD's mobile app and present it to a holder. How you present this link depends on your users' experience. For example, on desktop, the link could be displayed as a QR code that a holder scans with their GlobaliD mobile app, while on mobile devices, the link is rendered as a button.
A deep link has a base URL of https://link.global.id/proof and the following query parameters:
app_uuid- your Developer App's ID (client_id)proof_request_url- your app's URL to initiate creating a presentation requestredirect_url(optional) - location to redirect the holder on their mobile device after responding to your presentation request
Here's an example deep link:
Create a Presentation Request
After a holder activates your deep link, you will receive an HTTP POST request at the corresponding proof_request_url. This is when you need to create a presentation request.
To do so, start by getting an App Access Token. Then make the following request to GlobaliD's API:
proof_requirements- Submit Requirement Feature object defining the requirements of the credential you would like the holder to presentscreening_webhook_url- your app's URL to receive the holder's response as a webhooktracking_id- ID for correlating presentation requests and holder responses
The response should be returned to the holder.
Receive Holder Response
Once the holder responds to the prompts on their device, you will receive an HTTP POST request at the screening_webhook_url corresponding to the presentation request above.
If the holder consents to sharing their credential(s), you'll receive the following payload:
The proof_presentation property will hold a Verifiable Presentation object.
However, if the holder denies the request, you'll receive a rejection:
Verify Message Signature
In either case, you will receive an X-Signature header which contains a digital signature of the response payload. You should verify the signature with GlobaliD's public key, which can be retrieved with the following HTTP request:
Last updated